
Make a tall conversation readable in smaller attachments
A long conversation screenshot may become too small to read when a recipient's app fits the whole image to the screen. Splitting it into shorter attachments can make each piece easier to view. Decide the reading order and check the receiving app's actual pixel and byte restrictions first.
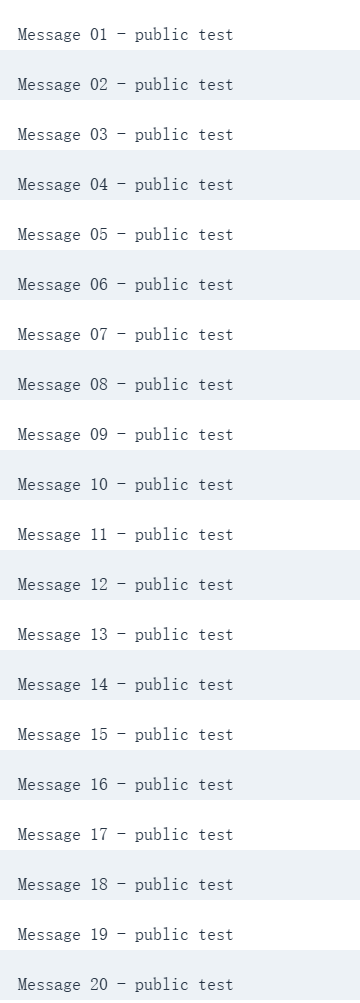
Use a copy containing only information you intend to share. Slicing is not redaction: a private name or message remains visible in whichever part contains those pixels. The public example here contains twenty numbered, authored test messages rather than a real conversation.
Understand what count and height modes actually do
By slice count divides the complete image into roughly equal heights. If the source height does not divide evenly, the first parts receive one extra row. Width is retained; the operation does not scale the text or identify where a sentence ends.
By slice height uses the requested height to calculate a number of parts, then redistributes the full height evenly across those parts. It is a target, not a fixed-height crop followed by a short final piece. Output is capped at 50 parts, so a very tall input can produce parts taller than a small requested height. Check the actual dimensions displayed for each part.
Split the numbered example and verify the joins
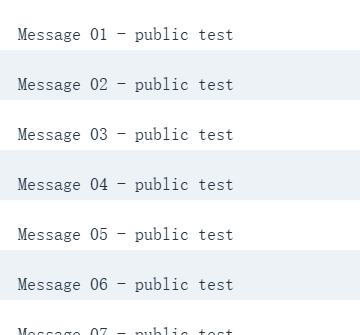
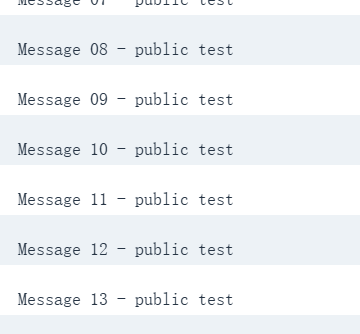
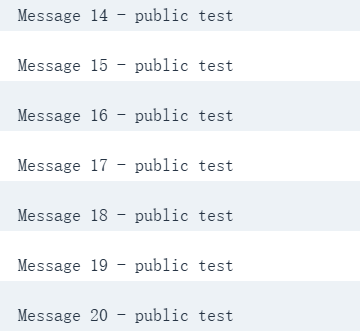
Our pixel check reassembled all three exported PNG slices in order and compared them with the 360 × 1,003 source: every decoded pixel matched. The row ranges below are zero-based. Preserving every row does not mean that each line of writing stays within a single attachment.
- Download the numbered source below and open it in Long Image Split. Choose the PNG file.
- Select By slice count and enter 3. Check the three cards: 360 × 335, 360 × 334 and 360 × 334 pixels.
- Download all parts as a ZIP, or download each numbered PNG individually. Retain the part numbers when attaching them.
- Open the first and last parts, then inspect both sides of every join. Confirm that message numbers continue in order and that the final image includes the bottom of the source.
- For this 1,003-pixel source, try By slice height with 400. It also produces 335, 334 and 334 pixel parts, illustrating the redistribution rather than a 400/400/203 split.
| PNG | Width | Height | Source rows |
|---|---|---|---|
| Original | 360 | 1,003 | 0–1,002 |
| Part 1 | 360 | 335 | 0–334 |
| Part 2 | 360 | 334 | 335–668 |
| Part 3 | 360 | 334 | 669–1,002 |
When a cut crosses a line of writing
Look closely at a join even when the total height is correct. A word can be divided between the bottom of one part and the top of the next. This tool does not offer automatic text-line detection, manual cut positions or overlap settings.
Try another slice count and inspect the resulting joins. If whole messages must remain together and no equal split gives suitable boundaries, use a workflow with manual crop boundaries or capture shorter source screenshots. Keep enough context to establish order, while checking the content you intend to disclose.
Verify the files after sending
Attach the numbered parts in reading order. A file chooser or chat application can reorder images or generate smaller previews, so inspect what the recipient can actually open. If a preview is soft, compare a downloaded attachment before assuming the slice itself is blurred.
Check byte limits separately from pixel height. PNG slice sizes depend on their contents and need not be equal; several parts can also have more combined bytes than the original. Retain the full source until you know that every required part arrived and remains readable.