
Why a photo stretches when you change its dimensions
An upload form might require a 400 × 400 image while your source is a portrait. Entering both numbers with the aspect ratio unlocked squeezes the full portrait into a square. Faces and circular objects change shape because the width and height scale by different amounts.
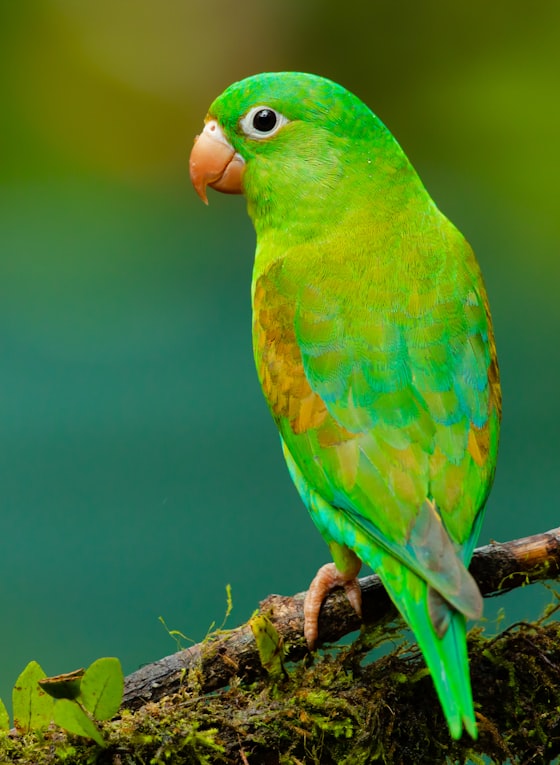
In Resize Image, leave Lock aspect ratio enabled and type the width you need. The height follows the original proportions, rounded to a whole pixel. For example, the public 560 × 765 photo below becomes 280 × 383 when its width is halved. It does not become a square.
| What you need | Use | What changes |
|---|---|---|
| A smaller copy with the same framing | Resize Image with the ratio locked | Pixel dimensions; the whole frame stays |
| An exact square from a portrait | Crop Image to 1:1, then resize | Some edges are removed |
| Every edge kept inside a different shape | Fit the photo on a larger background canvas | Space appears around the picture |
| A file below a KB limit | Compress to Size after setting dimensions | Encoded file size; inspect the result |
Crop vs resize: the same photo, two different results
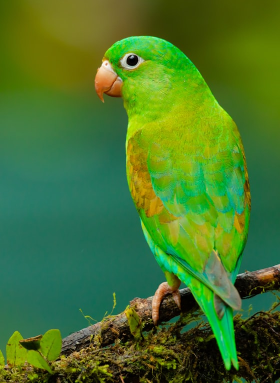
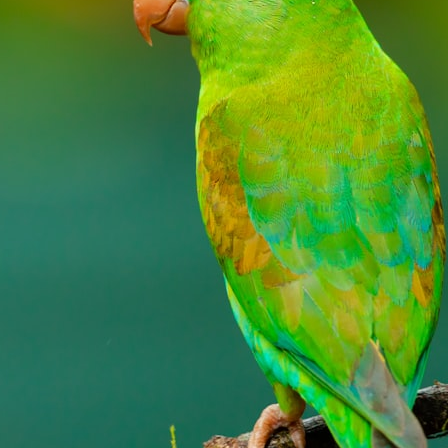
These are existing public tool examples using the same 560 × 765 source. The resize keeps the full frame at 280 × 383 pixels. The 1:1 crop keeps a 448 × 448 region instead. Look at the edges to see which part of the photograph the crop removes.
Choosing the 1:1 ratio in Crop Image controls the shape of the selection, not a fixed output width. The default square in this sample is 448 pixels across; you can move and adjust the box before exporting. A named size preset also resizes the selected area to its displayed dimensions. Read the output dimensions rather than assuming every square is 400 × 400.
| File | Pixels | Bytes | Framing |
|---|---|---|---|
| Original JPG | 560 × 765 | 78,667 | Full frame |
| Resized PNG | 280 × 383 | 209,336 | Full frame |
| Square crop PNG | 448 × 448 | 318,402 | Selected region |
How to make a 400 × 400 image without distortion
If the destination asks only for a maximum width, you can usually skip cropping and resize the original with the ratio locked. If it requires the complete portrait inside a square, use an editor that can place it on a square background. Unlocking the ratio cannot keep both the full frame and the original proportions in a differently shaped box.
- Keep the original. Open Crop Image, choose your photo and select the 1:1 aspect ratio.
- Move and adjust the square so that the subject and any required text stay inside it. Use a selection at least 400 × 400 pixels when the original allows it, so the next step can shrink rather than enlarge.
- Download the crop as PNG for this intermediate step. Open that file in Resize Image and leave Lock aspect ratio enabled.
- Enter 400 in Width. Because the input is now square, Height should also become 400. Generate the result and inspect faces, letters and all four edges.
- Choose a format the destination accepts, download the result and open that downloaded copy. Confirm 400 × 400 pixels, the actual file type and any byte limit before uploading.
Avoid blur and unexpected file sizes
Resizing a 200 × 200 crop to 400 × 400 adds output pixels through interpolation; it does not recover detail from the original photograph. Start with the largest useful source and inspect the final file at its intended display size. This resizer uses smoothing, so sharp pixel art may need a workflow designed for hard pixel edges.
Fewer pixels do not guarantee fewer bytes when the output format also changes. Our public source JPG is 78,667 bytes, while the smaller 280 × 383 PNG is 209,336 bytes. That comparison uses different encodings; it is not evidence that resizing always increases file size. Set the dimensions first, then compare accepted formats or use Compress to Size for a separate upload limit.
A lossless PNG intermediate avoids an extra lossy JPG save during the two-step crop-and-resize workflow. The final export still needs a visual check. Keep the original so that a failed crop or an overly small result can be redone from the source.
Why is the resized image still rejected?
Check the destination's requirements one by one: width and height in pixels, accepted format, maximum bytes and required framing. A 400-pixel square can still be too large in bytes, and a small file can still have the wrong dimensions. Changing the filename extension does not convert its contents.
Use the downloaded result for the final check. A web page can display an image in a small box without changing the file's stored dimensions. Open the file properties or an image editor to read its actual width and height, then try that copy in the receiving service.